
…la storia della MRF. Stay tuned.
…la storia della MRF. Stay tuned.
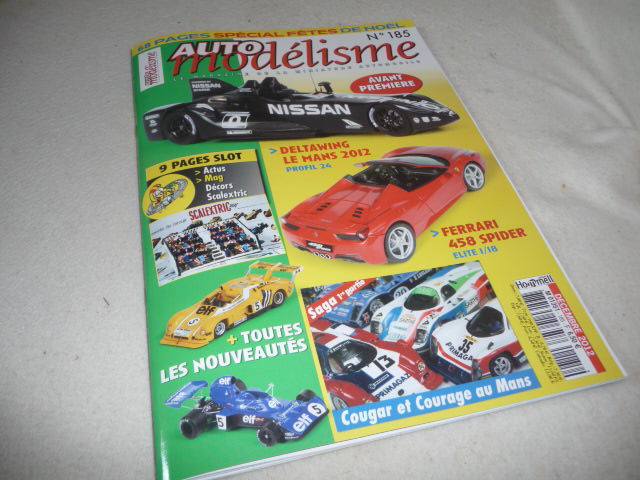
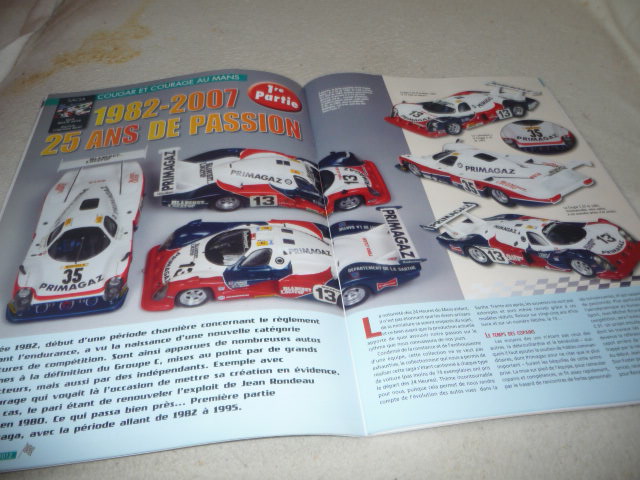
Si chiude l\’anno col Delta Wing in copertina, quello in scala 1:24 di Profil24, del cui kit la rivista francese pubblica la recensione. Del resto, da sempre (o quasi) la maggior parte delle recensioni dei modelli verte sulle scale più grandi. Gli articoli tematici di questo mese di dicembre sono dedicati alle Cougar/Courage a Le Mans in scala 1:43 (prima parte: 1982-1995); la seconda parte coprirà il periodo fino al 2007. E\’ l\’occasione di rivedere tanti modelli semidimenticati, prodotti dagli artigiani francesi del periodo d\’oro del kit, come DAM-Team T, cui va ascritta gran parte della tematica Cougar dei primi anni. Completano l\’articolo due tabelle, che riportano la lista delle Cougar a Le Mans dal 1982 al 1992 e delle Courage ufficiali dal 1993 al 1995: un bell\’excursus dalla primissima C01 alla C41. Il seguito della puntata, nel numero 186 di AutoModélisme, che sarà nelle edicole francesi ai primissimi di gennaio, ma che spesso in Italia arriva tardissimo (a Firenze ha preso a non arrivare mai prima del 16-17 del mese).
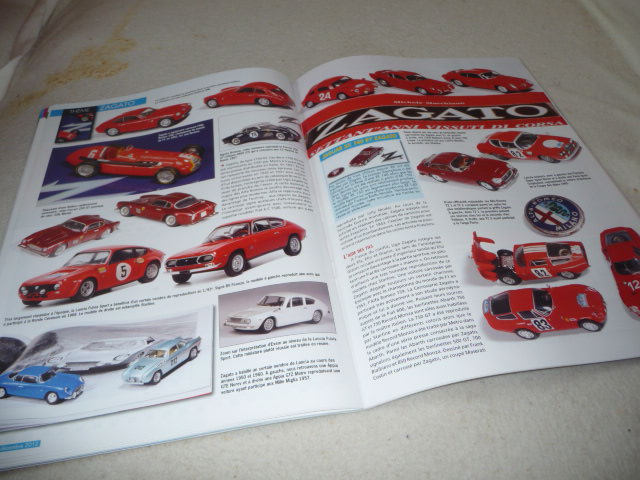
Secondo articolo tematico, una retrospettiva piuttosto generica sulle vetture carrozzate Zagato, in scala 1:43: nulla di completo, niente più di un\’infarinatura insipida e a dir la verità poco interessante. Del resto la vastità dell\’argomento, per ottenere un risultato appena più completo, avrebbe costretto a circoscrivere drasticamente il tema.
Modelli del mese, nella sezione 1:43: Hispano Suiza H6C Dubonnet Xenia 1938 di Minichamps (stradali), Alpine-Renault A441 Turbo Mugello 1975 di Spark e Citroen Saxo Super1600 di Accro Mini43 (corsa).
PS A forza di leggere articoli sulle slot, quasi quasi mi è venuta la voglia di tornare a un sano divertimento, lontano da certe inutili sofisticazioni. Scalextric o Carrera?
Je vais ainsi faire la connaissance de plusieurs personnalités internationales du monde de la miniature lors de leurs visites aux Ateliers AMR (Ciao Paolo !) entre 75 et 78.
Des collaborations vont naître pour faire paraître tel ou tel modèle.
C’est grâce à l’un de ces accords que me sera donnée l’opportunité, en 1977, de réaliser ma 1ère vraie maquette en cire, la BMW 320 GR 5 de 1977, qui sortira sous de multiples versions chez X-Minichamps.
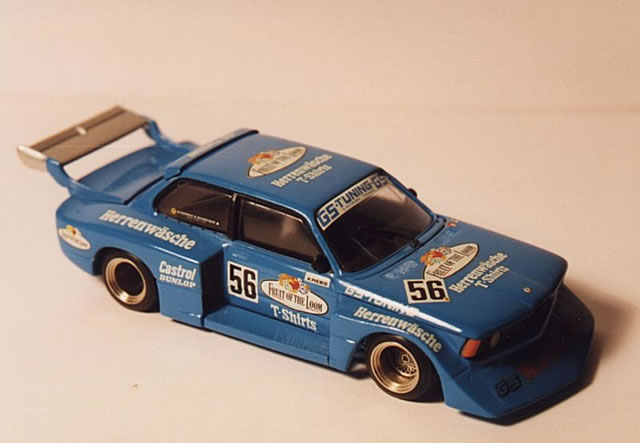
En ce temps-là, la réglementation en matière d’aménagements aérodynamiques sur les « berlines » engagées sur circuits nous permettait de découvrir des carrosseries de plus en plus aggressives et j’étais à fond dedans! A noter d’ailleurs qu’ avec ces Gr5, on retrouvait beaucoup de cet espèce de délire visionnaire qu’André-Marie avait eu avec ses fameuses 4CV plusieurs années auparavant ! Dans cet esprit, on me confiait la réalisation de 2 ou 3 transkits, dont cette Ford Escort GR5 1977 sur base Solido, encore pour Minichamps.

…merci à Phicanam. Et je me permettais encore quelques petits extras…de luxe, comme cette modification sur base Maserati 151, que l’on aperçoit au centre de cette photo, parue il y a bien des années dans Auto Modélisme.

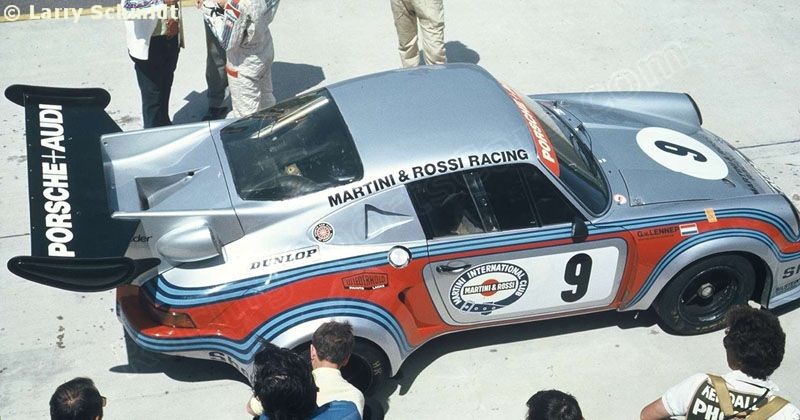
Sur cette même photo, devant la Maserati, celle qui aura été ma 2ème maquette entière en cire, la Porsche 935 Kremer Vaillant, sortie sous la marque BAM-X.

Une réalisation à la conception encore hésitante sur certains points… n’est pas André qui veut, et qui demandait une bonne dose de savoir-faire pour son montage… mais bien monté, l’esprit était à peu près bien rendu !

Des progrès j’allais devoir en faire, un certain Jean-Pierre Viranet allait intégrer l’équipe, il était très loin d’être maladroit… rien de tel que l’émulation pour vous donner des coups de pieds aux fesses …!
Alex Puggelli è uno di quegli appassionati dell\’1:43 che hanno saputo organizzarsi al di là di una semplice collezione, avviando collaborazioni e realizzando personalmente alcuni modelli inediti su basi esistenti e a volte create ex-novo. Vi invito a visitare il suo sito http://www.promodeltek.it/, ma qui di seguito troverete un\’intervista realizzata in questi giorni con Alex, che inquadra meglio il personaggio, che tra l\’altro vanta un\’esperienza in prima persona nell\’ambito dell\’automobilismo sportivo.
Come nasce ProModelTek?
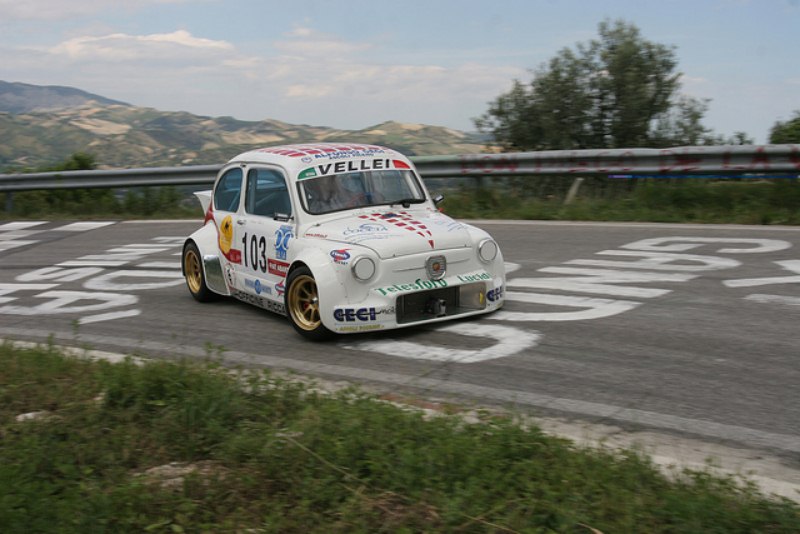
La ProModelTek nasce dalla passione per le auto da competizione e il modellismo nonché dall\’aiuto di mia moglie Francesca, web designer. Tutto questo mi è stato trasmesso dal mio babbo, appassionato di motori, corse, competizioni e naturalmente modellismo. E\’ collezionista dal 1964… ed io sono dentro a tutto ciò dal 1973, data della mia nascita. Ho avuto la fortuna di iniziare a correre sin dal 1994 nel Campionato Italiano SpecialCar700 poi trasformatosi in Campionato Italiano MINICAR700, con la Fiat 500-700 e la Fiat 126-700 preparate da Rossi Mario della RossiCorse di Grosseto.Il mio curriculum è ricco di numerose vittorie, pole position, piazzamenti, trofei, targhe e riconoscimenti. Tra i più importanti la targa ricevuta dal pilota Ivan Capelli nel 1996, il Trofeo ROMBO \”al pilota piu\’ meritevole\” nel 1998, le targhe dal Comune di Grosseto Assessorato allo Sport nel 2000 e 2001 e il Trofeo pole position Michele Alboreto nel 2003. Sono stato Campione Italiano nel 2000 e 2001 e Vice-Campione Italiano nel 1998, 1999, 2003, 2004. Quindi da tutto questo è nata l\’idea di realizzare in scala 1/43 le auto con cui ho corso.
In cosa consiste la produzione di ProModelTek?
.jpg)
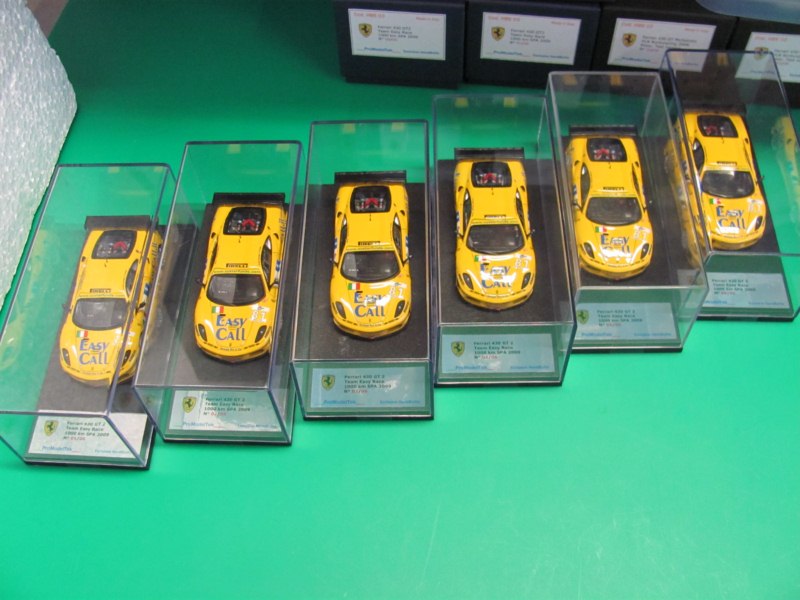
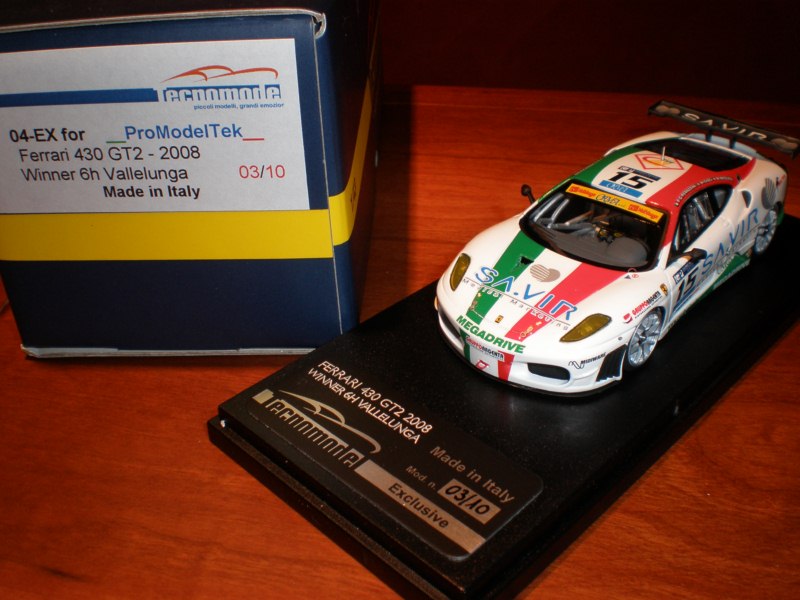
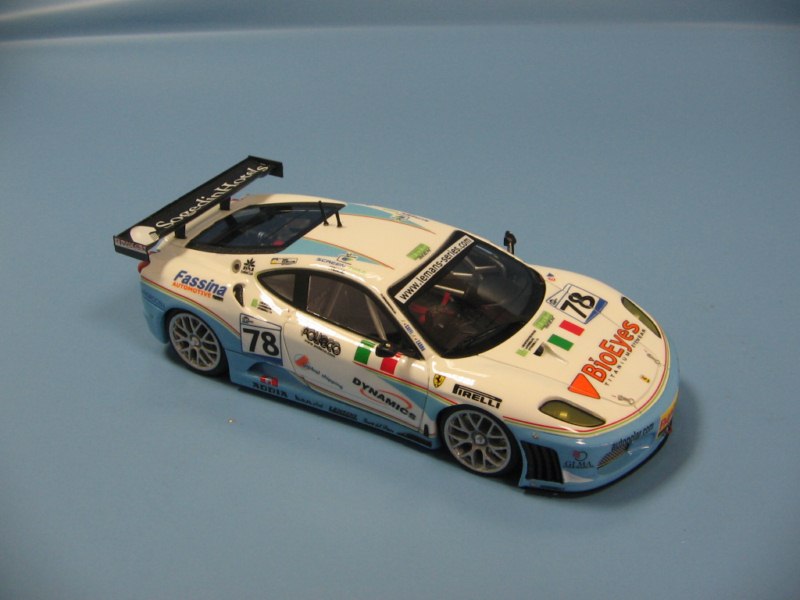
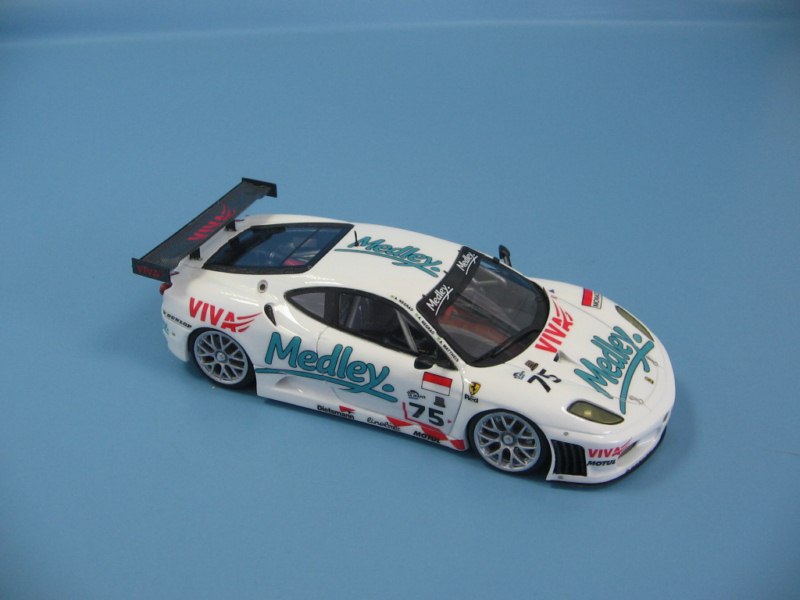
La produzione consiste nella realizzazione di modelli derivati da kit in commercio o elaborazioni/costruzioni da noi realizzate. I primi modelli sono stati quelli ottenuti con la collaborazione di Tecnomodel quali Ferrari 430 GT2 in varie livree, fra cui la Medley, Villorba, Daishin, Megadrive, Ferrari 430 GT2 Team Easy Race 1000Km Spa 2009 e la 575 GTC Rock Media Motors Mugello 2005. Con la Carrara Models dell\’amico Denis invece, abbiamo realizzato la Fiat 500/700 con la quale ho iniziato a correre e stiamo sviluppando anche la Fiat 126/700 che mi ha portato alla vittoria di varie gare e di due campionati italiani pista.
Al momento sto lavorando sulla Fiat 600 P2 Kawasaki che ha corso sia negli slalom che nelle salite, un modello di nicchia ma molto interessante poichè unisce lo storico al moderno; anche per questo modello posso dire di poter contare sul prezioso aiuto di Denis.
Sto anche realizzando una piccola serie di Ferrari 575 GTC, fra cui quella di Isolani da salita ed altre che hanno corso in pista, alcune Ferrari 430 GT2 in varie livree inedite, varie storiche fra cui Porsche 917, Ferrari 312P (Coupé e Spyder), Ferrari 312 PB superkit Tecnomodel aperto, Ferrari 250LM ed alcune Fiat 500/700 da pista. Uno dei modelli più interessanti è l\’Osella-BMW PA20S Evo, idea nata dal fatto che è un prototipo da corsa plurititolato e fra i più utilizzati nelle salite italiane ed europee.
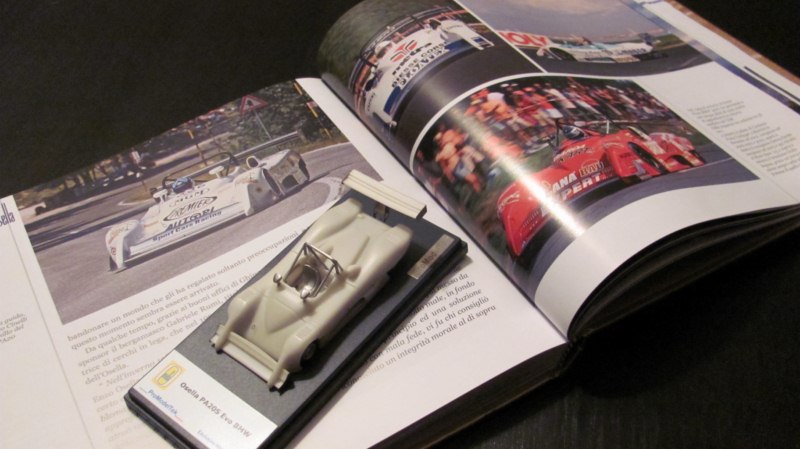
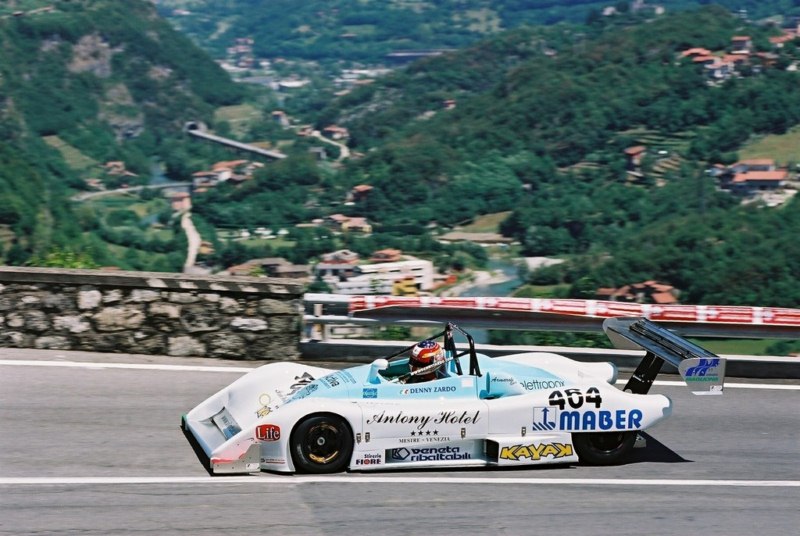
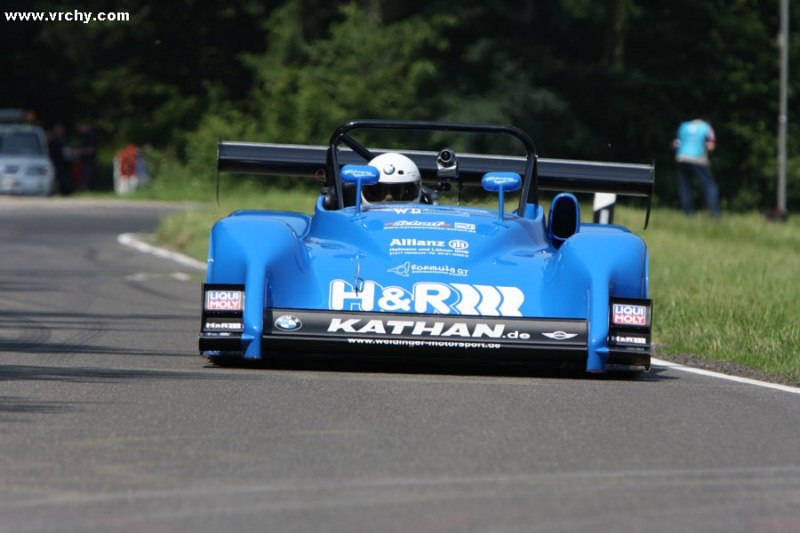
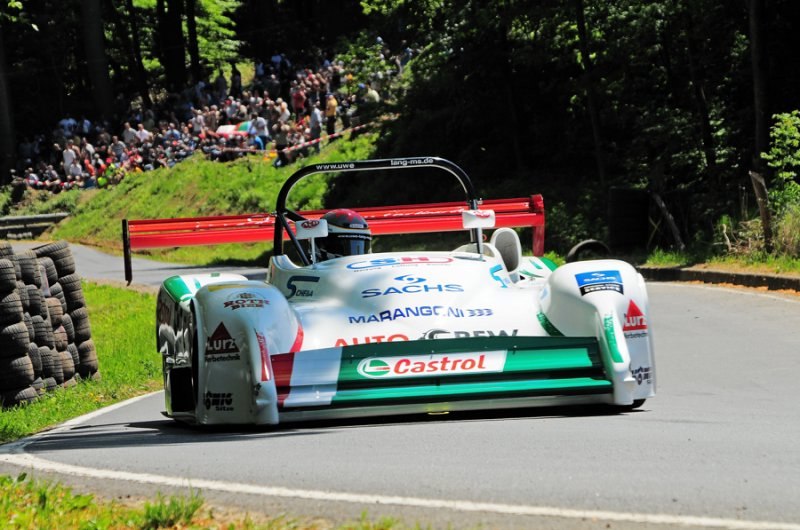
Ho progettato insieme a Denis il modello sia coda corta che coda lunga, quest\’ultimo inedito in scala 1/43 che dovrebbe essere molto appetibile per i collezionisti. Saranno disponibili le versioni: livrea presentazione, Zardo Campione Europeo montagna 2003, Uwe Lang livrea Castrol e Jorg Weidinger livrea H&R.
Per il futuro conto di realizzare alcune Ferrari 430 GT2 che hanno corso a Le Mans nel 2010, partendo sempre da base Tecnomodel, utilizzando decals specifiche.
ProModelTek esegue anche montaggi singoli?
Naturalmente montiamo vari modelli su richiesta del cliente effettuando anche migliorie o radicali modifiche. Di recente abbiamo realizzato alcune Ferrari 312 B3 da superkit Tameo ed in questo momento stiamo lavorando su altri superkit Ferrari 312 T2 e T3 e Lotus 79 commissionate da un nostro affezionato cliente.


Credo sia un inedito assoluto, e se non lo è per lo meno è un fatto abbastanza raro, che un grande produttore si metta in \”polemica\” con un marchio concorrente, e per di più su un argomento che concerne i massimi sistemi, ossia i materiali impiegati. In passato si era assistito a polemiche più o meno degne di un foro boario fra piccoli artigiani, ma quelle sono le baruffe tipiche della guerra fra poveri. Qui, invece, siamo in presenza di dichiarazioni ufficiali di una casa come Spark, che in questi giorni ha risposto ad un articolo apparso il 25 settembre sul sito di AutoArt. La questione può essere interessante e ve la ripropongo.
Questo l\’articolo di AutoArt, per la verità un po\’ capzioso:
Resin models – 25 Sep, 2012
|
|
|
||||||
|
|||||||
In altre parti del blog avevo notato come Spark sia particolarmente \”attenta\” a cogliere ciò che di interessante hanno prodotto certi artigiani, riproponendo alla sua maniera modelli che sicuramente non lasceranno indifferenti gli appassionati dell\’automobilismo sportivo degli ultimi decenni. Del resto, tutti hanno sempre copiato tutti: e se oggi Spark clona (o copia? o si ispira?) modelli altrui, gli artigiani non hanno forse vivacchiato per lungo tempo clonando i modelli AMR e ancora prima i vecchi Solido, Politoys e Mercury? Allons…
Questa, però, è davvero stramba: quasi contemporaneamente, Marsh Models (nella nuova gamma denominata Group 7) e Spark sono usciti con la stessa versione della Lola T222 di Bonnier che corse nell\’Interserie, 200 miglia di Norimberga 1971. Non certo la versione più conosciuta della T222, ciò che rende il caso ancora più bizzarro. Indovinate, fra Marsh Models e Spark, chi sarà il meno contento?
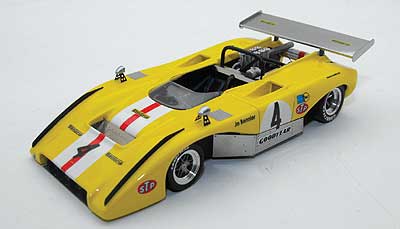 |
| Marsh Models GRP43001, disponibile in kit o montato. |
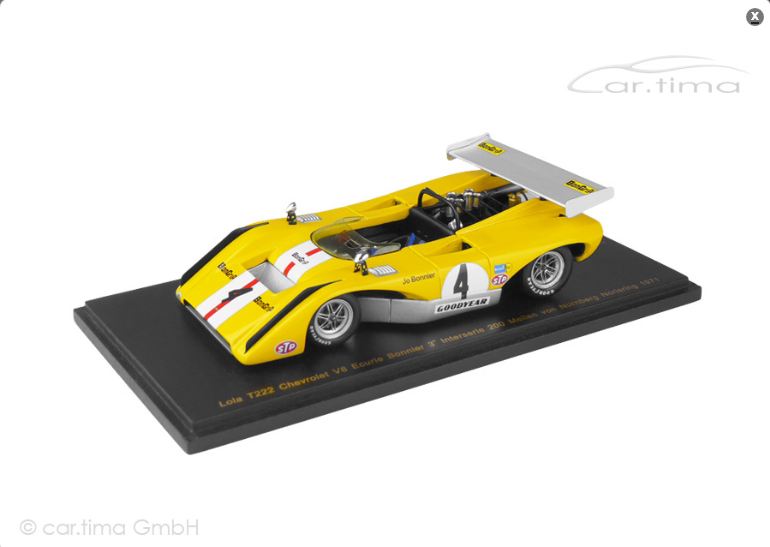 |
| Spark RS1106, edizione speciale limitata a 300 esemplari. |
Ho iniziato a collezionare modelli (scientemente perché collezionista ci sono nato) nel 1977, a sei anni; ho iniziato a collezionare AMR nel 2006, ossia 19 anni dopo. In mezzo ci sono stati molti cambiamenti, molte battute d\’arresto, ripensamenti, correzioni di rotta e marce indietro. E\’ normale. Per sei anni, fino a oggi, ho trovato nei modelli AMR una risposta alle mie esigenze, pur non avendo del tutto abbandonato altri filoni che mi accompagnano da sempre. Iniziai a interessarmi agli AMR quasi casualmente, dopo un momento di \”crisi\” nel quale mi ero accorto che i vari diecast (soprattutto Minichamps) coi quali avevo inzeppato la collezione erano né più né meno che un accumulo inutile di robaccia. Oggi penso la stessa cosa dei Minichamps ma sono andato oltre. Riguardo gli AMR e non mi emozionano più. Perché? Sostanzialmente perché stanno tornando alla ribalta vecchie passioni. Innanzitutto quella per certe auto che AMR non ha mai riprodotto: il mio pane sono le auto da competizione (soprattutto endurance) fra gli anni sessanta e ottanta; sono nato e cresciuto con i kit Provence Moulage e Starter, con montaggi spesso anonimi ma rispettosi di un certo rigore storico e compravo un AMR non perché era un AMR ma perché riproduceva un modello che mancava nella mia raccolta. La scelta di AMR fu una scelta quasi obbligata in un periodo in cui temevo che i vecchi kit montati e i nuovi diecast nella mia collezione non avrebbero retto l\’urto del tempo. Negli AMR trovai sicurezze che non avrei trovato in un Ixo o in un Minichamps. Mi avvicinai a quel mondo e vi trovai collezionisti di lunga data, persone più o meno gradevoli, commercianti che volevano farmi credere che Cristo è morto dal sonno e se non ci credevo di incazzavano dandomi dell\’incompetente, montatori di grande prestigio e inconcludenti wanna-be con nessun futuro davanti a sé. D\’accordo. Mi sono divertito. Ho percorso quel mondo col massimo della leggerezza possibile, e anche col massimo della curiosità. Ho imparato molte cose e le competenze acquisite non se ne andranno. Ma ora è tempo di passare oltre, non necessariamente cercando cose nuove, ma riscoprendo parte di quelle vecchie, valorizzandole e guardandole con occhi più maturi dopo aver scartato definitivamente ciò che prima di tutto questo creava problemi. Riassumendo molto, sento l\’esigenza di qualcosa di più semplice, forse anche di meno costoso. Mi sono stufato dei cosiddetti montatori top che prendono 400 o 500 euro a montaggio, delle basette che costano 50 euro e dei falsi idoli che un certo tipo di mentalità da parvenu ha creato, non so a beneficio di chi. E\’ pieno di gente che segue ciecamente le mode, anche in questo settore. Dici una cosa e sei mesi dopo li vedi muoversi sul sentiero che avevi intrapreso; parli di un montatore, e lentamente lasciano il proprio per avvicinarsi alla star di turno. Basta. A me piacciono le auto e il collezionismo è un modo per averle tutte in casa. In questo momento, per me vale più un montaggio di Renardy, onesto e condotto magari in collaborazione col sottoscritto, che dieci Daytona sbudellate da qualche genio francese o qualche montaggio magnificato dal re dei broker americani. Basta, basta, basta. A me piacciono gli Spark, col loro inimitabile rapporto qualità/prezzo. Coi soldi di un montaggio di Hayakawa ci faccio mille altre cose. E\’ questione di priorità. Non sono fra quei poveri di spirito che danno di \”tonno\” a chi spende tali cifre in modelli. Sono arrivato a una spanna dal farlo per concludere che non lo farei. Non aggiungo la parola \”mai\” solo per onestà intellettuale. Torno indietro nel tempo a ciò che ero prima del 2006: stessa passione di oggi, collezione diversa. Recuperare certe cose del passato non significa fare dei passi indietro, ma piuttosto aver ripreso in chiave diversa una vecchia dimensione. Il recupero della semplicità dopo un lungo percorso è diverso dalla conservazione della semplicità per mera mancanza di nuove esperienze.
 |
| …trovate una piccola scrostatura, se vi riesce… |
Nella mia vita sono tornati a dare allegria i vecchi obsoleti. Vedo Retromobile come una bella occasione per acquisire dei pezzi che ho sempre desiderato. Naturalmente, questo recupero lo vivrò alla mia maniera: solo modelli assolutamente perfetti e non mi farò mancare qualcosa di davvero eccezionale quando ci sarà occasione. Non sarà un semplice accumulo ma uno studio sulla storia delle marche preferite, una collezione composta anche da memorabilia e arricchita da testimonianze di persone che a suo tempo lavorarono in quel settore (a Parigi ho conosciuto un paio di ex-dirigenti di Dinky France, presso i quali ho fotografato cose che neanche vi immaginate – che testimoniano oltretutto come ci sia una certa continuità fra la produzione Dinky e i primi prototipisti del mondo degli speciali; su questo argomento varrà la pena tornare).
So che non è tutto. Ma non mancherà occasione di approfondire due o tre temi.
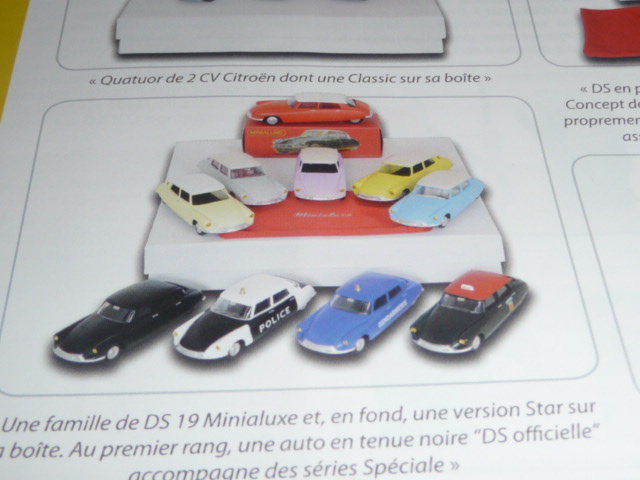
La copertina di Passion43ème né33 (dicembre-gennaio) ricorda ai lettori l\’ormai imminente rinascita della gamma Minialuxe, che sarà presentata a Retromobile e su cui spero di tornare presto. La rivista francese è coinvolta in questa operazione che vedrà l\’uscita di diverse serie di modelli con varie rifiniture, la nascita di un club e di varie edizioni limitate.
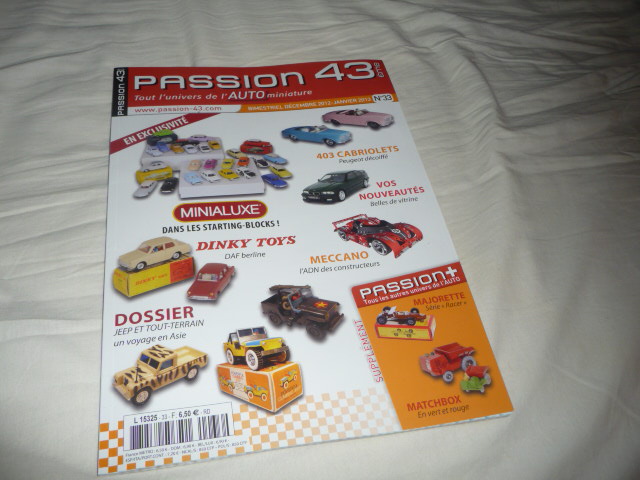
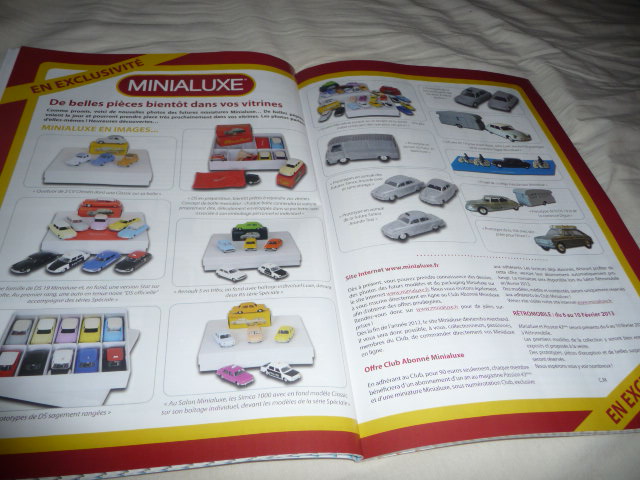
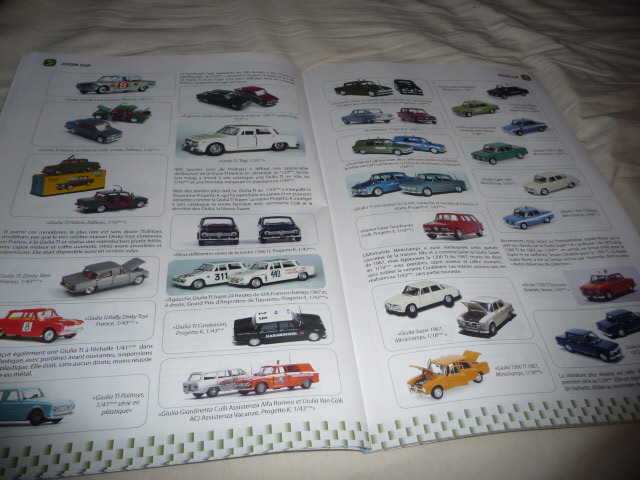
Passion43ème è una delle pochissime pubblicazioni che riportano con dovizia di particolari le attività delle associazioni e le cronache delle borse di scambio francesi ma non solo. Fra gli articoli più interessanti, uno speciale sulle Peugeot 403 Cabriolet, una rassegna sulla Giulia berlina e un\’analisi della DAF berlina della Dinky Toys. Ricordiamo che Passion43ème verte principalmente sul mondo dell\’obsoleto e del diecast, ma non mancano interessanti escursioni fra gli speciali.

Ce modèle hors-série, j’insiste sur ce fait et tout à fait unique, qui préfigurait la future sortie du kit X a je crois bien, été présenté dans les rubriques modélisme de Auto Hebdo ou de L’Automobile de l’époque… Quoiqu’il en soit, je suis incapable de dire ce qu’il est devenu…s’il existe un heureux propriétaire de ce modèle et qu’il lisait ces lignes, il peut toujours se manifester !
1976…

WIP
Ferrari Collection 1/43
Testo e foto: Umberto Cattani
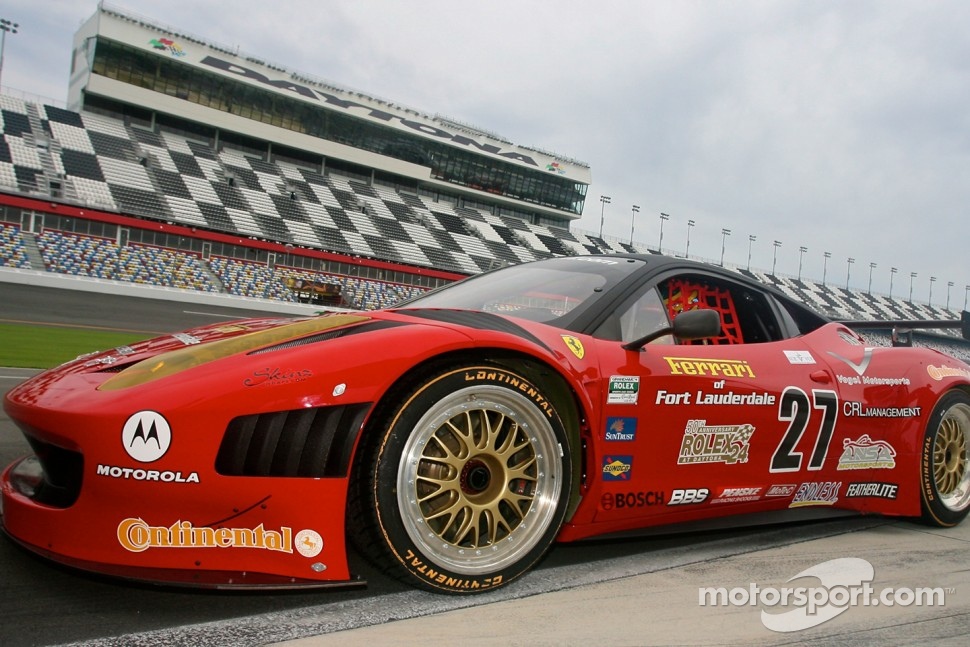

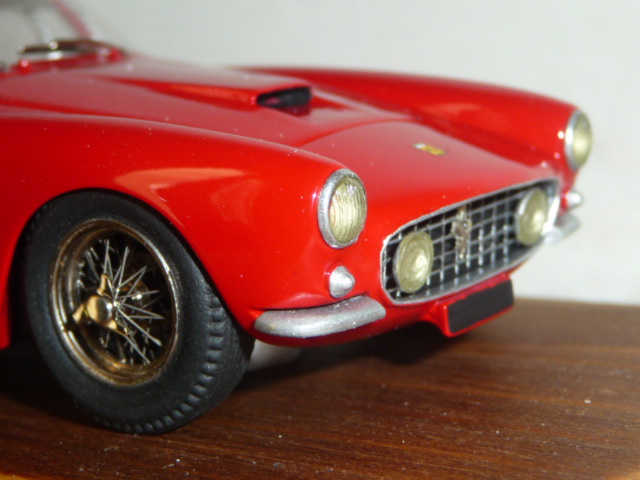
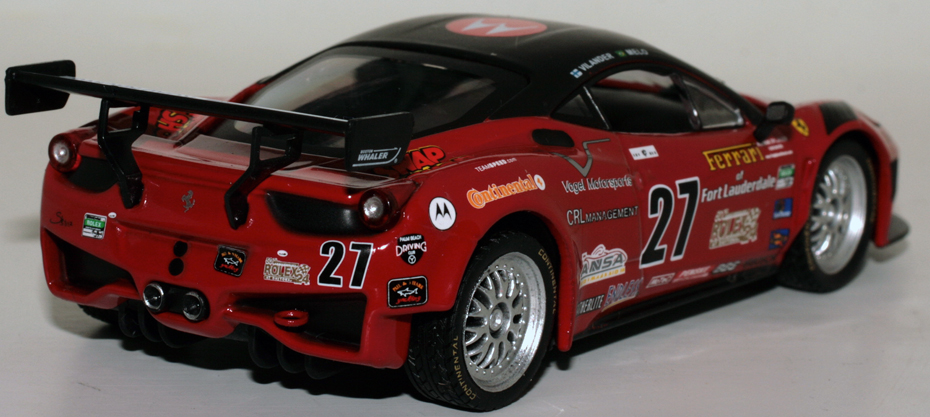
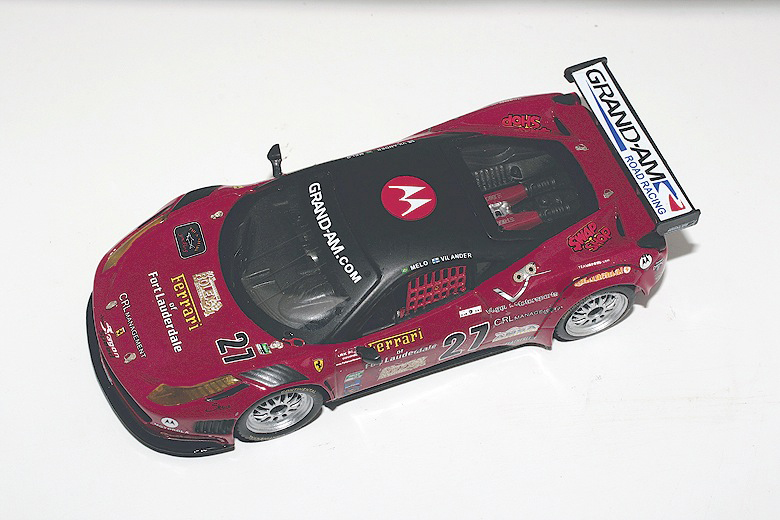
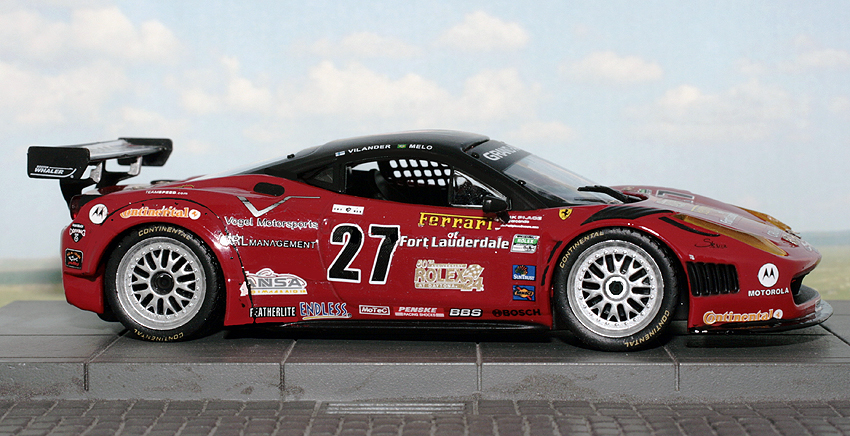
Il modello uscito la scorsa settimana per la serie da edicola Ferrari Collection riproduce piuttosto fedelmente la Ferrari 458 Italia, nella classica scala 1/43. Prezzo abituale per questa raccolta, poco meno di tredici euro ed una presentazione dignitosa, consistente in una teca con base che imita una porzione di pista e relativo cordolo. Dopo la versione 458 GT2 già proposta in passato, ecco ora questa variante Grand-Am, diversa dalla sorellina in numerosi dettagli.
 |
|
Fresca di edicola, ecco la vostra 458 Grand Am. Considerando le temperature di questi giorni, mai definizione fu più calzante.
|
La decorazione è ottenuta grazie a decalcomanie ad acqua, un grosso vantaggio per quanti vorranno cimentarsi in un rifacimento completo del modello con relativa sverniciatura.
A nostro parere, non ne vale la pena, bave di stampaggio non se ne vedono e nemmeno sono evidenti gravi errori di base come nel caso del modello uscito in precedenza nella collana, la 512S già da noi esaminata e rivista.
 |
|
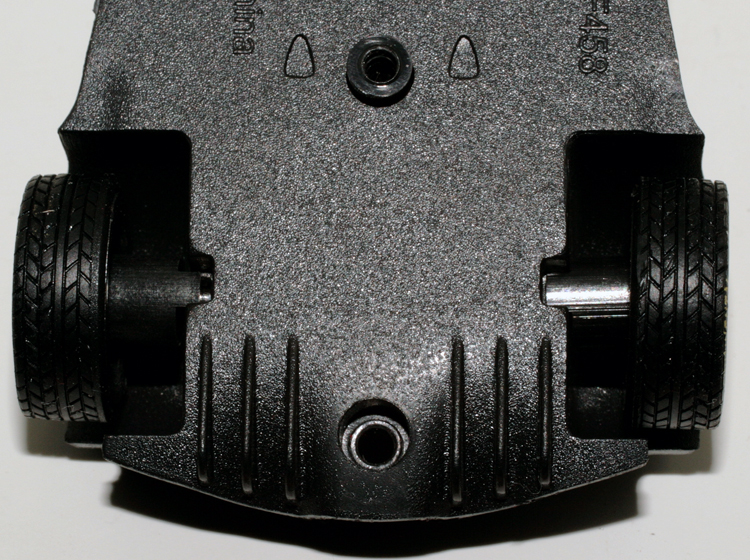
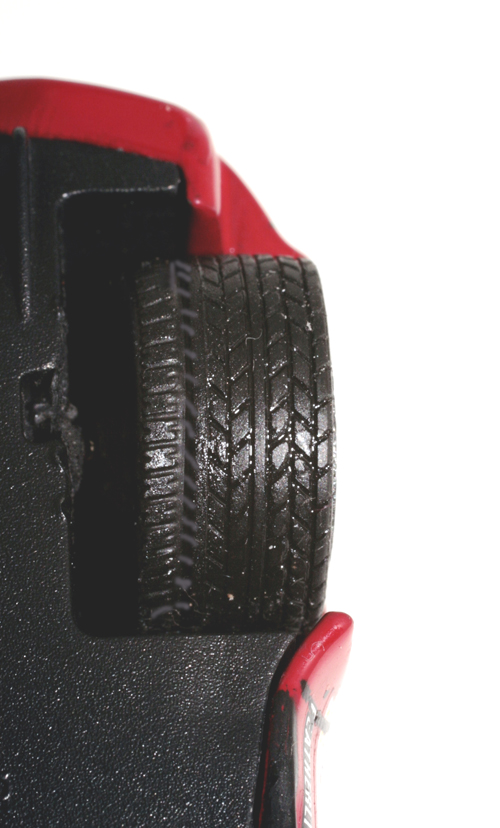
Vista di coda, si nota subito la larghezza insufficiente delle gomme. I più smaliziati, potranno rimpiazzare le pinne verticali dello scivolo con altre in lamierino.
|
Per rettificare qualche leggera imprecisione nel posizionamento delle decalcomanie, queste sono state parzialmente tolte, immergendo per qualche minuto il modello in acqua calda. Aiutandosi con un pennellino, non sarà troppo complicato staccare le varie scritte, favoriti dal film unico che racchiude gli sviluppi del cofano anteriore e delle fiancate. Posate quindi le decal su un foglietto di supporto, ritagliando successivamente ogni sticker aiutati da un cutter ben affilato.
 |
|
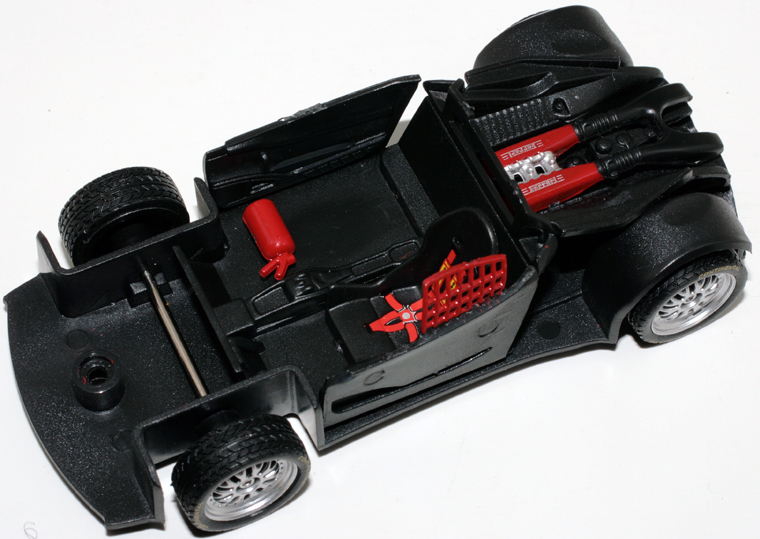
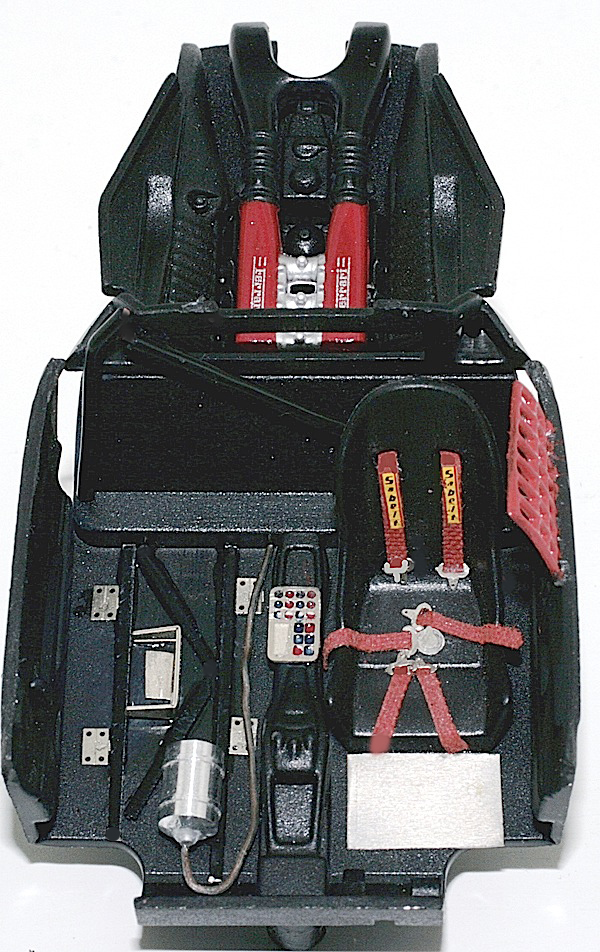
Miseria e poca nobiltà. Gli interni si presentano così ai vostri occhi. Una bella agitata alla scatoletta magica e come d\’incanto compariranno gioie e nuovi splendori.
|
Come già accennato, non si notano errori grossolani, solo le gomme posteriori appaiono eccessivamente strette. Per allargarle sufficientemente, abbiamo dovuto affrontare qualche leggero grattacapo. Impossibile trovare in commercio loghi Continental da applicare a nuovi pneumatici quindi le coperture originali andavano obbligatoriamente mantenute. Dopo qualche momento di perplessità (le cambiamo o no?) è prevalsa l\’idea del \”tanto poi, alla fine, l\’occhio mi cascherà sempre lì…\” quindi mano all\’inventiva. Con cautela abbiamo smontato i cerchi dall\’assale, cautela richiesta dalla fragilità del pezzo stampato in plastica piuttosto fragile. Il bordo esterno è stato eliminato, rifilandolo completamente, una lamina in metallo larga circa 3 mm. è stata incollata all\’interno del canale e su questo abbiamo inserito un tondino metallico poi fresato a filo. Partendo da una gomma intagliata provvista di battistrada, abbiamo sezionato due strisce sempre da 3 mm. poi incollate alle originali con un prodotto vinilico. Ad essiccazione avvenuta, il pneumatico va poi dipinto in nero opaco molto diluito. In questo modo, la larghezza originale è rispettata, con buona pace delle nostre paranoie da fedeltà. Sulla scocca, purtroppo, non sono stati riprodotti i parafanghini riportati. Noi ovvieremo con pennello e mano ferma, chi sceglierà la strada radicale del rifacimento, potrà con una fresa adatta e mano fermissima incidere direttamente sulla scocca la giunzione tra codolini e carrozzeria. Noi, che parteggiamo per un bricolage all\’acqua di rose, confideremo in una manualità giottesca e nulla più…
 |
|
Da questa prospettiva si notano meglio le gomme, particolari che voi allargherete seguendo i consigli indicati nel testo. Una leggera sudata ma che vi farà bene al fisico ed alla mente.
|
Gli interni sono da poverelli. Cinture a decal, un estintore che pare una bombola di gas liquido ed assenza di ogni minimo particolare. Spazio quindi al vostro estro, una foto vi mostra nel dettaglio l\’inserimento di cinture adeguate, rinforzi sul pianale, centralina elettronica e barra diagonale del roll-bar. Sul parabrezza, ricavati da fili neri di nylon, abbiamo incollato i tre rinforzi paralleli del cristallo, obbligatori da regolamento. Sempre a proposito del roll-bar, non abbiamo foto esaurienti per riprodurre fedelmente la zona in prossimità delle portiere ma fortunatamente il nostro modello è montato con viti, un particolare che ci permetterà ogni intervenuto futuro senza alcun problema. Il filetto di protezione lato guidatore è stato ripulito da qualche bava e poi dipinto in rosso satinato.
 |
|
Mannaggia a li cinesi… Metterebbero ribattini anche alla tazza del riso. In ogni caso, almeno in questa occasione, il vostro modello non avrà bisogno di manipolazioni e vari smoccolamenti, immancabili.
|
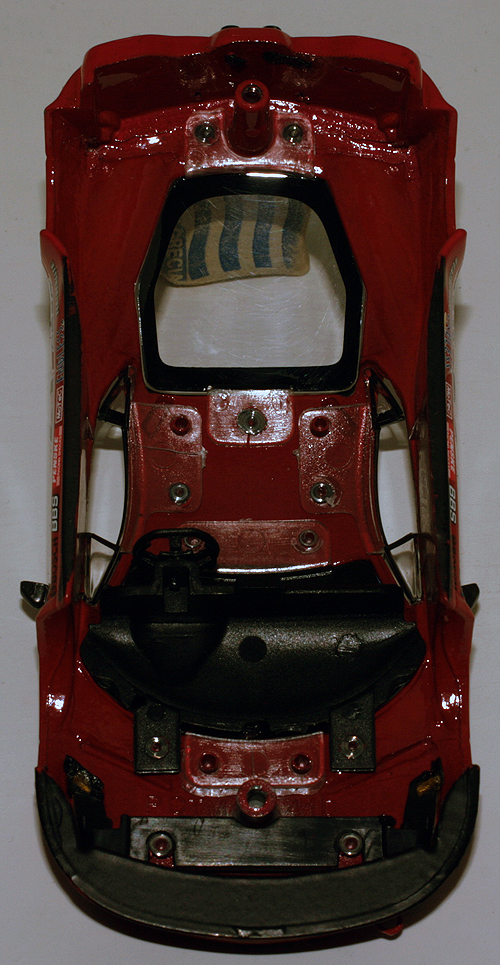
Al posto dei fermacofano stampati con una volgare decalcomania abbiamo incollato particolari fotoincisi. Alla base del montante di sinistra, ecco il laccetto che comanda l\’impianto d\’estinzione, una finezza imperdibile per un modellista ruspante. Si tratta di un dettaglio sempre fotoinciso e di provenienza scatola del fai date. Le zone dipinte in nero opaco richiedono qualche piccolo ritocco di vernice, un lavoretto facile facile. Il doppio tappo di rifornimento sul lato sinistro è ora in metallo fotoinciso, mentre i bulloni dei cerchi vanno dipinti in nero. Rivisto anche l\’assetto, abbassato fresando la sede degli assali. I braccetti anteriori che sostengono l\’alettone sono da dipingere in colore alluminio. Otto minuscole clip circolari, sempre ottenute con fotoincisioni, figurano a meraviglie altrettanti rinforzi sul lunotto e sul parabrezza.
 |
|
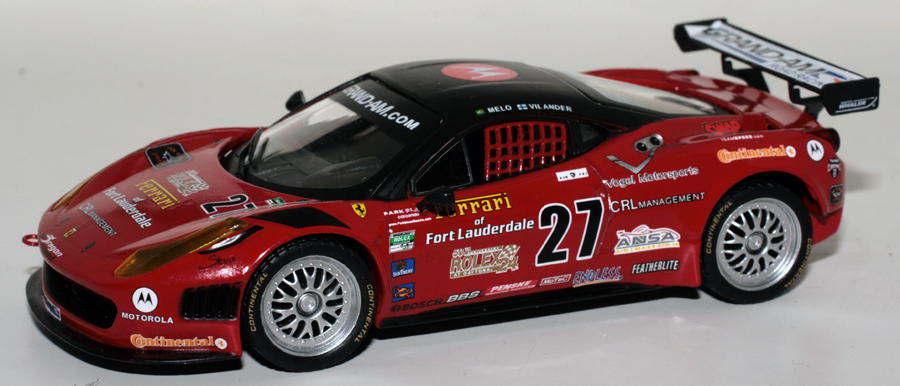
Ecco le gomme riviste e corrette nella larghezza. Noi vi abbiamo suggerito un modo per elaborarle ma ognuno è libero d\’esprimere il proprio talento come meglio crede.
|
Per ottenere in trompe l\’oeil i parafanghi rapportati abbiamo fatto ricorso al tratto a pennello. Con mano ferma (niente cicchetti oppure caffè a gogo e nemmeno stecche di nazionali esportazione, mi raccomando…) si cerca di ripercorrere fedelmente l\’arco desiderato. Se non risulterà perfetto, potrete sempre ripulire il tutto e ricominciare per gradi fino ad ottenere un risultato finale decente, in linea con le vostre aspettative.
A noi è parsa discutibile la scelta della riproduzione di un vettura laboratorio ma siamo certi che in futuro vedremo altre livree della 458 Italia Grand-Am, riferite magari alla vincitrice della Serie 2012, per mano di di Segal ed Assentato.
 |
|
Gli interni ora appaiono più preziosi e ricercati. Cinture in cerotto (Adami docet..) con fibbie fotoincise, consolle elettronica, estintore tornito, rinforzi vari, Melo si troverà ora più a suo agio.
|
 |
|
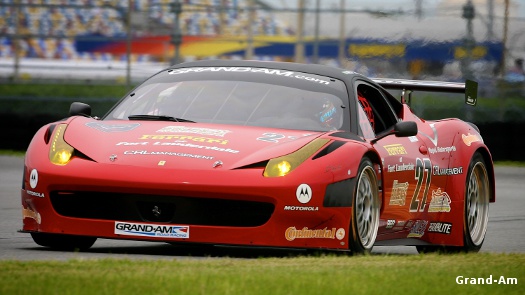
La livrea Motorola è discreta, tetto nero opaco e corpo vettura rosso Ferrari. A noi, piace poco ma a chi preferisce una certa pulizia di base, la 458 Daytona 2011 può apparire rigorosamente bella.
|
 |
|
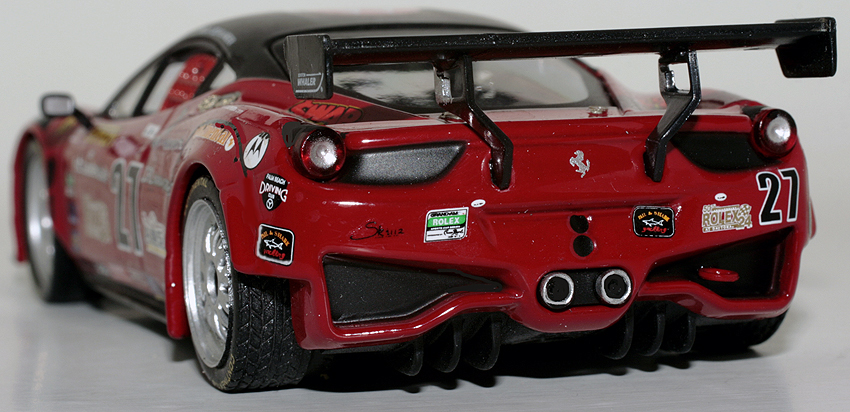
Quasi inesistenti le modifiche in coda. La parte superiore dei gruppi ottici va dipinta in nero opaco, qualche ritocco è indispensabile qua e là ma in modo quasi impercettibile.
|
 |
|
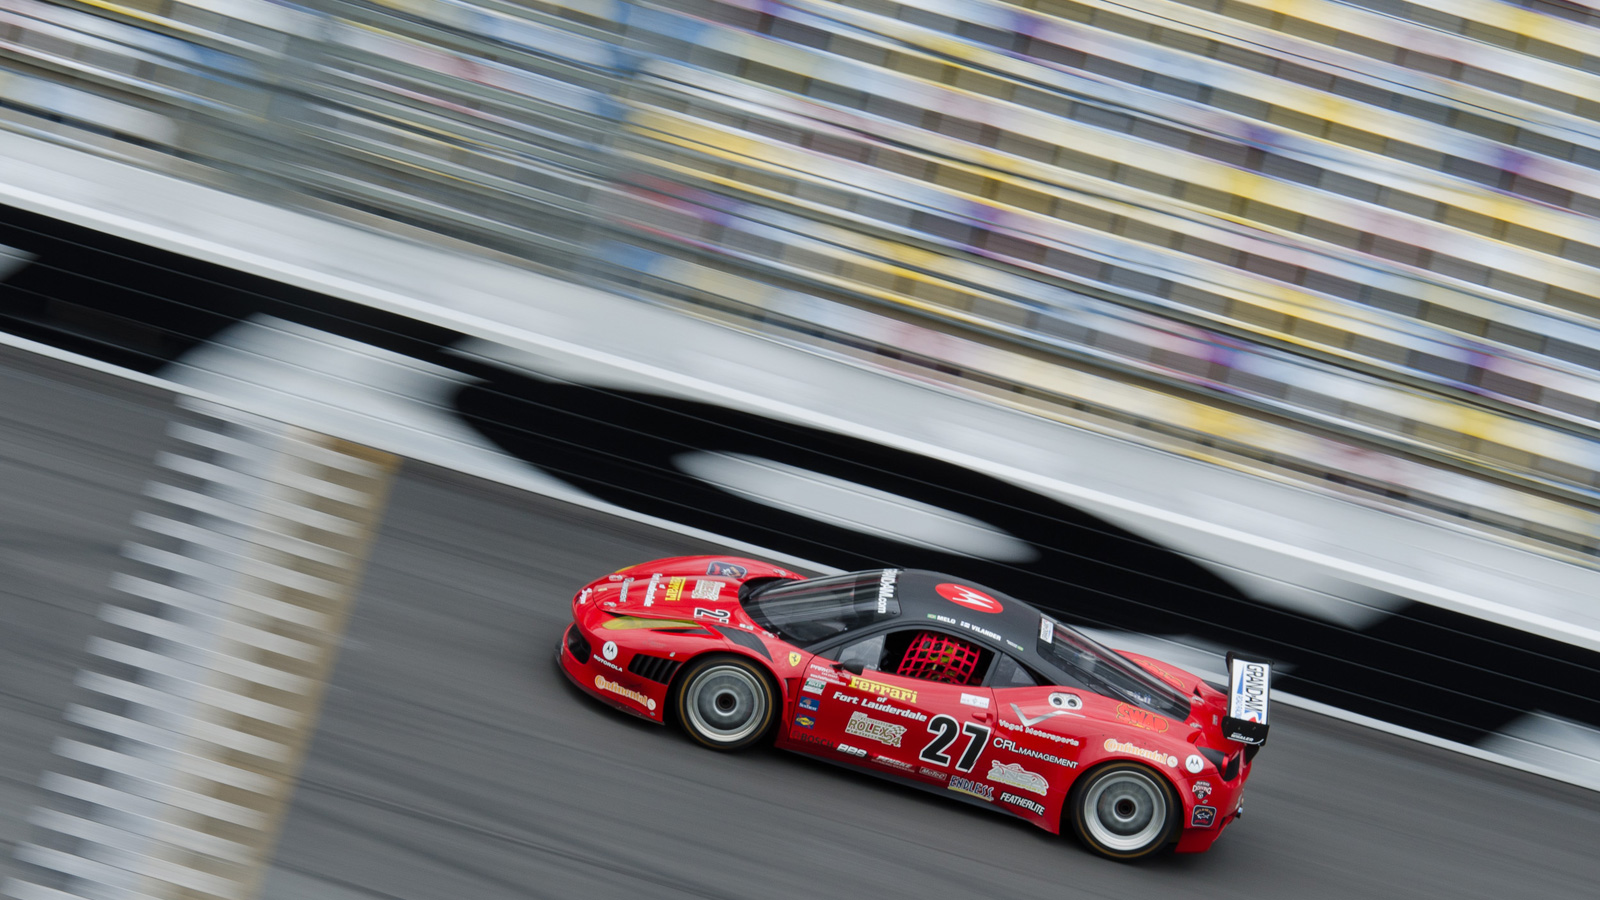
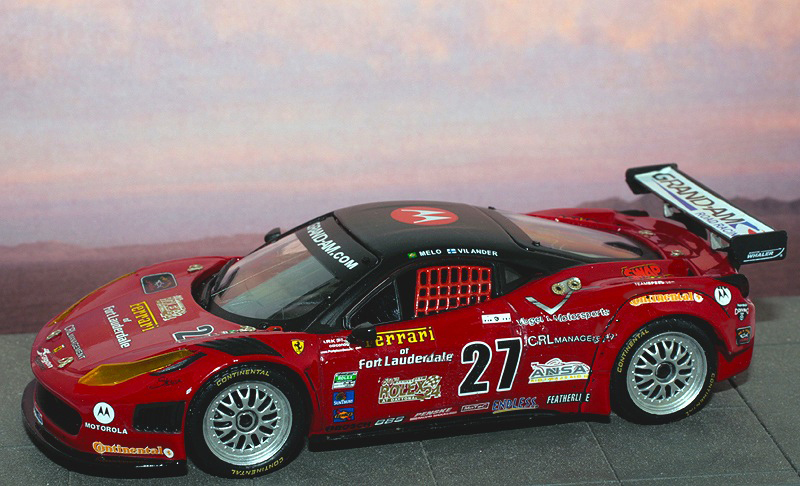
E\’ già mattino, Melo sta apprestandosi ad indossare guanti e casco. Peccato per quelle Continental, fa caldo ma le gomme faticano ad andare in temperatura. Maledetta monogomma, era forse più adatta ad un\’altra giumenta…
|
Questa bella 458 sarebbe il pane adatto a chi mastica transkit ma il momento attuale non sembra riservare agli avventurieri eccessivi spunti, anche se la speranza è sempre l\’ultima a morire. Eh, beh, se imbarcassimo questo modello nella macchina del tempo programmando il timer sul 1983 o giù di lì, se ne vedrebbero davvero delle belle, ma siamo sul finire del 2012 e, come per altre cose, dobbiamo giocoforza accontentarci di un trans-spread, più in linea con i temi attuali. Triste, sì, ma questa è la realtà, per scaldare i muscoli questa 458 ci sembra comunque un attrezzo davvero indicato. Onesto, sincero e di poche pretese. Dimenticavo l\’ultimo dettaglio: spenderete 13 euro ma l\’edicolante vi darà come resto un bel centesimino, che in questi giorni di festa spenderete come favolosa strenna natalizia. O tempora, o mores….
 |
|
Siamo al tramonto, le nuvole della Florida si tingono di rosa e noi, con la lira in mano, strimpelliamo note d\’amore per la bella giunta al riposo. Toys for big romantics.
|


